
10 Steps to Plan Your Homeschool Year (with a Free Printable Homeschool Lesson Planner!)
So you have decided that you want to start homeschooling. Now what? Or maybe you have been homeschooling for a while but are feeling disorganized and frazzled. Here is my framework for planning lessons- and my year- to make sure that I am intentional in what I teach my kids in our homeschool. I have also created a free printable homeschool lesson planner to share with you. This printable PDF has everything you need to help you feel organized and to teach with intention this school year!
Step 1: Find Your “Why”
What are your reasons for choosing homeschooling? Why are you homeschooling your child? Are there things about their experience in traditional school that you are looking to avoid? Or are there benefits that you hope to gain? It is important to start with these reasons, because these are the fuel that will keep you going when the going gets tough. I wrote a whole post about reasons to homeschool, which you can reference here. The free printable homeschool lesson planner includes a page to journal about your reasons for homeschooling that you can save for reference throughout the school year.
Step 2: What are the Legal Requirements?
When I started, this was one of the scariest parts of homeschooling to me. I knew that there were truancy laws in my state, and I imagined a scary CPS worker coming to my door, and demanding custody of my children because they weren’t at school. Fortunately, this fear was unfounded. I’ve found that the best way to fight fear in this area is with the truth.
First of all, DO NOT start by calling your local school district. Some local school districts are awesome and helpful and have great information about homeschooling. But, others do not and might try to scare you away from homeschooling at all. Your local school district gets funding for each student that’s enrolled. So your decision to homeschool your child represents a loss of a pretty significant chunk of change to your local school. That’s ok; you are doing what is best for your child which is your job as their parent. But going to your school district for homeschool advice is like going to Target to ask how to shop at Wal-Mart. You’re asking your competitor for advice.
Where should you go for advice?
Instead, a good starting place is the Home School Legal Defense Association (HSLDA). They have a great interactive map on their website. You can click on your state and find out lots of great information including:
- The ages for which the legal school requirements kick in (in many states this does not start until age 6 or 7). I’m not saying that you shouldn’t home school younger kids. However, you might get a grace period before you need to deal with the homeschool laws.
- Whether or not you need to notify the local school district- in many states notification is not required, especially if you don’t enroll your child in the public schools to begin with.
- What qualifications are required of you as the teacher, if any.
- What subjects are required to be taught.
- Whether and what kind of testing and record-keeping is required.
- Whether immunizations are required.
- The specific homeschool laws for your state and how to comply with them.
Take a few minutes now to research your state’s homeschool laws. If record-keeping is required, it is much easier to set up a system at the beginning than to try to recreate the records later.

Step 3: Set Goals for the Year in your Free Printable Homeschool Lesson Planner
Now that you know what is required by your state, it’s time to think about your own goals for your child. This is where you get to have fun dreaming about the reasons why you are keeping your child home in the first place.
For our family, our faith plays a big role in why we are homeschooling. We believe that our first and most important priority is to teach our kids to know and love God, and so this plays a role in every homeschool subject we teach. In addition to specific Bible lessons, we teach other subjects with a Biblical worldview wherever possible. I also believe strongly in the importance of reading. From a young age we have spent a lot of time as a family reading together and teaching my kids to read is a huge priority for me.
Another thing to take into consideration is the strengths and weaknesses of your child. You should consider both academic subjects and developmental milestones when choosing your goals. You might include gross or fine motor skills, or social skills that you will be practicing with your kids, in your goals for them.
I wrote a whole post about how to set goals and decide what you will be teaching your kids, and what you should consider when making these decisions. You can find that resource here.
The free printable homeschool lesson planner includes a goal setting page where you can record the goals that you have for each of your children for the school year. It is important to write our goals down. Research shows that we are more likely to achieve the goals we write down!
Step 4: Think About How Your Homeschool Will Look
You’ve researched the legal requirements for homeschooling in your state. You’ve chosen what subjects you will focus on, and figured out what your child needs to know. Now it’s time to figure out how you would like to teach these subjects, and how your child will best learn them. This is a really important step that is often skipped, and it will save you lots of frustration on behalf of you and your child (and money spent on the wrong curriculum) later.
As you read through this list of learning styles, think about your child. Which ones seem like they fit your child’s personality? Knowing your child’s learning style is important so that you can plan your homeschool lessons to match the way your child learns best.
Seven Learning Styles
Visual
This child learns by seeing pictures. They might enjoy imagining what they are learning or drawing a picture or making an art project.
Musical
This child learns with music and songs. They might like to make up their own songs or play instruments.
Related Post: Maestro Mastery game review
Verbal
This child learns by speaking, hearing, reading, or writing words. They might have a large vocabulary, or repeat what you say to help remember it.
Physical
This child learns by doing. They love gross motor and large muscle activities and they learn better when they are moving.
Logical
This child learns with logic and reasoning. They enjoy making patterns, solving problems, and following directions step by step.
Social
This child learns best with other people. They love working together with others (or with you) and learn best that way
Solitary
This child learns best alone. They need time to think about what they have learned and process it by themselves.
Types of Learners
- Visual Learners learn by seeing and reading.
- Auditory Learners learn by listening and speaking.
- Kinesthetic Learners learning by touching and doing.
Most people have a dominant style that they prefer, but learn information from all three. It is helpful to think about how your child learns best, and to make sure to teach using that style. But, the best lessons will incorporate aspects of all three styles whenever possible. For example, let’s think about a lesson teaching the names of the alphabet letters. A visual lesson might involve looking at a list of the letters of the alphabet, and pointing to different letters while saying their names. An auditory lesson might include singing the ABC song together. And a kinesthetic lesson might be tracing the letters with a finger.
Lessons that Combine Learning Styles:
My favorite alphabet letter lesson is actually to play with magnetic letters at the fridge with my kids. It works so well because it uses all 3 types of learning as we are putting the alphabet magnets on the fridge:
- Visual: We are looking at the letter magnets to see the shape of the letter. Our letter magnets are also brightly colored.
- Auditory: We are saying the names of the letters together as we put each one on the fridge. At first, I narrate the lesson: “That’s A. That’s H, etc.” As we progress the child takes over that job and tells me what the letters are. I follow the Montessori 3-period lesson structure, which you can read about here.
- Kinesthetic: Our magnets are the shape of the letter, so my child is feeling the shape of the letter in his hand as he puts it on the fridge.
To make a lesson that includes all the aspects, the easiest way is to start with the kinesthetic. How can you make this lesson hands-on? Can you include a game? Some manipulatives? An experiment? Then, try to add visual and auditory pieces as you present the lesson.
Homeschool Teaching Styles
Traditional
At its most basic, traditional homeschoolers are re-creating the experience of a traditional public school at home. These families might use textbooks and workbooks as their curriculum, and they might give tests to show mastery of the ideas. They might set up a schoolroom in their house with desks and a whiteboard. This is often a very comfortable starting place for parents who come from a public school background because they are doing what they know. And the structure of a traditional school setting can be really helpful for some kids and families.
Classical
This type of homeschooling is based on the trivium, which was developed in the Middle Ages by Martianus Capella. Classical homeschool families focus on teaching kids how to think by using 3 main stages of development as a basis for their curriculum. In the Grammar stage, kids focus on memorizing and repeating facts in a wide variety of subjects. In the Dialectic stage, kids begin to ask questions and compare and contrast as they think logically about what they know. Finally comes the Rhetoric stage, where kids focus on communicating what they know through writing and speaking.
Charlotte Mason
This method of homeschooling was created by Charlotte Mason, who was a British author and teacher in the late 1800s. These families focus on exposing kids to lots of high quality “living books” as textbooks and spending lots of time outside in nature. Instead of taking tests, kids “narrate” or tell or write what they have learned when the lesson is done.
Unit Studies
In the unit study method, homeschool families focus all their curriculum and lessons around a specific topic that they study in great depth. A family doing a unit study about the Egyptians might read stories about mummies for a language lesson, calculate the volume of a pyramid for math, read about the history of ancient Egypt, and even make a mummy for a science lesson. Unit studies tend to focus on hands-on learning and may be a great fit for families that are teaching kids of multiple ages together.
Montessori
This philosophy was developed by Maria Montessori who was a doctor and educator in Italy in the early 1900s. Montessori believed in creating a prepared environment where specific educational materials would be displayed and available for kids to choose to use. These families give kids lots of choices in how they are learning within the prepared environment.
Waldorf
This method was created in the early 1900s by Rudolf Steiner. Kids learn through activities, rather than textbooks. They study art and music, nature and gardening. Lessons focus on morality and educating the whole person.
Unschooling
This is a type of homeschooling that is lead by the student and their interests, rather than a curriculum. Unschooling families will use their child’s curiosity as a guide, and allow the child to focus on learning about what they are most interested in.
Eclectic
Eclectic homeschool families will choose elements of several different methods to create their own approach that best fits their child and their family. These families see value in different methods and use the pieces of each that best fit them.
Take a few minutes to re-read the list of learning styles with each of your children in mind. Notice which styles seem to describe them best. Look through the homeschool teaching styles as well to see which ones resonate with you. Then take a few minutes to brainstorm how you might use this to help you teach. The free printable homeschool lesson planner can be used with any of these homeschool styles!
Step 5: Choose Your Curriculum
Before you get started with choosing a curriculum, there are a few general things to consider as you look at a new curriculum:
1. Does this curriculum match your child’s learning style?
If your child is a hands-on learner, a textbook with lots of small print and an accompanying workbook might not be a good fit for a science curriculum. You might want to look for a book of science experiments to do instead.
2. Does it match your teaching style?
Do you love to get messy with your child and make projects? Or does the thought of a huge mess in your kitchen make you cringe? Would you prefer to cuddle with your child on the couch and read a book? It’s best to be honest with yourself about your preferences upfront. Choosing a curriculum that aligns with how you prefer to teach will make homeschooling more fun for you and will make you more likely to do it!
3. How much hands-on involvement from you as a teacher is required?
Some curriculums are very hands-on and require you to be present to lead the child through the lesson the whole time they are learning (especially at a younger age), and others can be done completely independently. You might even be able to find a video curriculum that can teach a subject or two for you! It’s good to find a balance here. It is helpful to have a subject or two that’s more independent for your child so that you have a few minutes of breathing room or a chance to help a sibling. You will want to be hands-on for some of it too, however; this is why you are homeschooling!
4. How much planning is required?
There are a lot of great curriculums out there that are “open and go.” When it’s time to do that subject you will just open the curriculum to the next lesson and follow the directions. In my first year of formal homeschooling, I used a curriculum that did all the lesson planning for me. There was a master teacher book that had the day’s lesson completely organized. It told me what pages we should read in the history book, what our topic was for the day’s math lesson, and even what art project we should do. It had a supply list for the week’s lessons and even suggested songs to sing and stories to read. This curriculum made it easy for me to homeschool. I wasn’t spending a lot of time planning lessons; I could literally open the book to the next page and teach that day’s lessons.
By contrast, I am using a math curriculum now that is totally NOT “open and go.” It has a textbook, and a workbook, and 2 different supplemental workbooks. I also have a teacher’s guide that is supposed to show how all these books work together, but it has additional suggested activities of its own. I am finding that I have to spend additional time weekly figuring out what we are going to do for each day’s lessons. If I don’t commit this time I won’t be prepared for our lessons. Try to look for an “open and go” curriculum if you can!
5. How does it fit with your state’s requirements?
Does your state require that you follow common core? Will your child be required to take standardized tests that cover certain topics? If so, finding a curriculum that aligns with the state’s standards will be helpful in alleviating stress at test time.
You can check out my curriculum reviews to find ideas for great homeschool curriculum options.
Step 6: Choose a Schedule
You will need to decide how many days per week you would like to do homeschool, and for how many weeks. Many states require a certain number of days or hours of instruction, so this is a good starting point. Other than that, the schedule is up to you. You might consider homeschooling less than 5 days per week, so that you have flexibility to run errands, attend a playgroup, sign up for a class or team, or just take a day to have fun. You might chose to start your school year earlier or end later, or homeschool through the summer. This would give you some flexibility to do school 3 or 4 days per week, or to take some extended time off for holidays or vacations. Homeschoolers love to take their vacations when school is in session- things are less crowded and vacations are cheaper!
Setting Priorities
Once you have decided how many days per week to homeschool and for how many weeks, you will need to figure out how often to study each subject. Some subjects will be a part of your homeschool every day. Subjects like math where the material builds on itself are important to practice daily so that concepts aren’t forgotten. You might also have subjects that are important to your family that you want to study every day. Bible is one of those subjects for our family.
You might also look at your child’s skills to see where you would like to prioritize their practice. When my son was learning to read, we practiced reading every day- even on weekends when we were not doing formal homeschool. Now we are really focusing on handwriting because he needs some extra practice in this area. We start our homeschool day with handwriting each morning to make sure that we get it in.
Alternating and Loop Schedules
Some subjects are important but not important enough to do every day. If you have some of these, you could choose days of the week to do them. For example, “We do science on Monday and Wednesday, and history on Tuesday and Thursday. We do art on Friday.”
Another alternative to this is a loop schedule. In a loop schedule, you choose one or more subjects and alternate them. On each homeschool day, you do the next subject in the loop. So, if your loop includes science, history, and art, you do science on the first day, history on the next, then art, and then back to science again. The advantage of the loop schedule is that one-time appointments don’t mess up your schedule. If you only do art on Fridays, but you have appointments 2 Fridays in a row, it could be 3 weeks before you do art again. With a loop schedule, you would just push art to Monday and you wouldn’t get behind.

Step 7: Divide Up Your Curriculum
Your next step in scheduling will be to figure out roughly how to divide the content or lessons that you have up throughout the year. Some curriculum comes already divided into lessons, or even into weeks, and this makes it really easy. Count up the number of lessons and the number of weeks in your homeschool year, and divide them up to figure out how many lessons per week you will need to do in order to finish the curriculum in the year.
Other curricula might not be divided this way. You might figure out roughly how many pages in the book you need to read per month or week. Then you can estimate some mile markers- “I want to be starting chapter 3 in this book by October, and done with chapter 6 by Christmas,” etc. Or you might choose a topic to study in depth each month. It is helpful to have a general plan like this for each subject that you will be studying this year.
Be flexible
Once you have a general outline of the year, this is where I recommend that you stop with long-term planning. If you create a detailed lesson plan for each lesson for the whole year (other than taking a really long time) you will be committed to following it. What happens a month from now when your child takes a sudden interest in frogs and you decide that you want to take a break from your science curriculum to learn about frogs and grow tadpoles instead? Or when your child starts really struggling with their spelling words and you discover that you need to slow down to work at a pace they can handle?
You can re-visit your sketch for the year every month or two to make sure that you are still on track, or that you are comfortable with modifying your plan to accommodate the new direction your lessons have taken.
Step 8: Plan Your Month with the Free Printable Homeschool Lesson Planner
It is really helpful to look ahead at the lessons you have planned for the month. I mostly do this for gathering supplies. About once a month I check the curricula we are using for each of our subjects to make sure there are no books or homeschool supplies we will need for the upcoming month’s lessons that we don’t already have. This gives me time to add supplies to my next shopping list or Amazon Prime order. I also like to look for library books to complement the topics we will be studying. Planning ahead gives me time to organize a trip to the library.
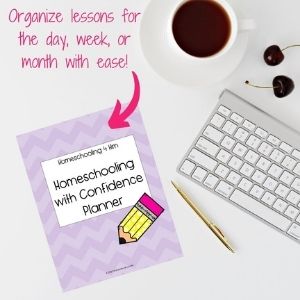
The free printable homeschool lesson planner includes a blank calendar that can be used for monthly planning. This calendar will also be helpful as you plan which days will be school days in each month. You can record the dates of holidays and family activities and plan your homeschool lessons around those dates.

Step 9: Plan Your Week
Once a week, it is helpful to spend time planning lessons for the week ahead. I usually take a few minutes on the weekend to do my planning for the upcoming week. I get out my curriculum resources for each subject we are studying, and I choose which lessons or activities I hope to get done each week.
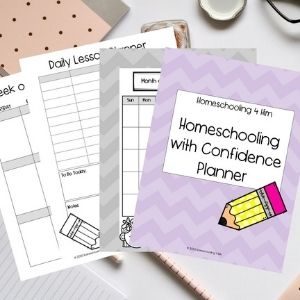
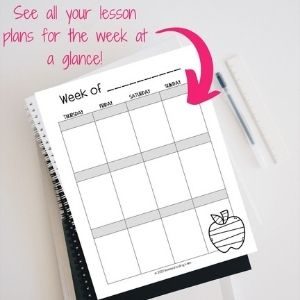
The free printable homeschool lesson planner includes pages that you can print to fill in your plans for each day of the week. It is helpful to choose which subjects you will be studying on each day, and to have a general plan of what you would like your kids to do or learn in each subject. Curricula that is divided by lesson makes this easy; you can just mark which lessons your child will complete each day. If your curriculum is not divided this way, make sure to choose which activities, practice problems, reading sections, and supplementary materials you will be completing each day.
It is important to remember that it’s ok not to follow the plans exactly. Sometimes one of my kids gets really interested in one of the topics we are studying, and we take a detour to spend some extra time learning about that topic in more depth. Or, something that I had planned is much more confusing than I expected and we need to slow down to make sure we get enough time to practice the concept. The goal of lesson planning is not to create a bunch of rigid rules that have to be followed. The goal is to think intentionally about what we want our kids to be learning and make a target to strive towards. Feel free to change your plans in the free printable homeschool lesson planner throughout the week as needed.
Step 10: Plan Your Day with the Free Printable Homeschool Lesson Planner
I usually take some time each evening to look over my planner and plan what I’ll be doing the next day. The free printable homeschool lesson planner includes a page to do this. On this page you can plan your homeschool lessons as well as your to-dos and even your menu for the day. It helps me to be able to see everything I need to do in one place, and that’s why I designed the free printable homeschool lesson planner to include places to record the other things you are doing in your day, besides homeschooling. I also take some time in the evenings to reflect on the day’s homeschool lessons and to adapt my plan for the next day based on how the previous day went.
Download your Free Printable Homeschool Lesson Planner Today!
The Homeschooling with Confidence free printable Homeschool Lesson Planner has everything you need inside to plan your homeschool year- and your daily lessons- with confidence. This planner includes daily, weekly, and monthly planning sheets that can be printed and customized to fit your family and your homeschool, no matter what kind of homeschool method you choose. Journaling sheets for recording your reasons for homeschooling and your goals for the year will help you stay motivated and intentional as you plan your lessons. This planner also includes an attendance record sheet so you can record the days that your child attends school for legal reasons. Get yours for free and start planning your homeschool year with confidence today!


I love this printable materials! Thanks for them!
Thank you for detailing this out! I was able to send your blog post to a friend who is looking into homeschooling her child.
You have explained things so nicely, step by step. Love your idea and thanks for these printables.
You’re welcome, Cheeia! I’m glad it helped!
Yay! I’m so glad you could help your friend, Kimmy! Thanks for sharing!
Thanks, Puja! I’m glad you enjoyed them.
This is great! This will be so helpful to all those mamas out there trying to homeschool!
I bookmarked this post and just requested to download the planner. Super excited for it – thank you! This is our first year of homeschool, and already, I have tested out 3 styles of homeschooling and we’re only on month 3. I think we have found what works best for my little one. It’s so true – long term planning sounds like a great and organized idea, and I had wished I did this when we felt chaotic and all over the place in August. But now that we tested the waters and learned through trial and error, I’m actually really glad we remained flexible and not tied to a long term plan. I like the idea of a weekly plan and to go with a more open and go type curriculum. Only because my child is a reluctant learner (or WAS, as she has really changed for the better since we started homeschooling and found the right fit for her), and also because we have a toddler. Thanks for the planner and the great tips! Will definitely be following!
Thanks, Bri!
Hi Deb! I’m so glad this was a helpful resource for you! The first year is definitely the hardest, I think because it does take some time to figure out what works for your family. I’m glad that you are finding things that work for you!