How to Make a History Timeline for Homeschool
My kids really enjoyed studying world history in our homeschool last year. And I am always looking for ways to help them apply what they have learned with fun hands-on activities. They loved making a history timeline for our homeschool using the Individual Timeline Set: Creation to Christ (Beginning – 100 AD) from Home School in the Woods. Here’s what you need to know to create your own history timeline with this awesome resource.

I received a copy of the Individual Timeline Set: Creation to Christ (Beginning – 100 AD) in exchange for my honest review, but all the opinions in this post are my own.
Why Make a History Timeline?
Timelines put historical events into context.
When making a timeline, kids can see how different historical events and people are related to each other. They can see at a glance the chronological order in which things happened. This can help them recognize cause and effect relationships between events. Over time they will develop a visual understanding of history.
Timelines create a reference for history lessons.
As your family creates a timeline, your kids will have a context for future history lessons in your homeschool. Kids can relate the new information they are learning to events they have already studied using their timeline.
Kids learn about the passage of time.
With a timeline, children can practice their math skills as they compare dates of events. Kids will also be able to understand the passage of time better when they can see it in timeline form.
The concepts of BC and AD can be tricky for kids, and a timeline is a valuable tool to help them understand how this works.
Creating a timeline is interactive.
The process of making the timeline is a great hands-on activity for kids to help them remember what they are learning. Older kids can add details from their lessons to the timeline. This is an easy way to help them remember what they are studying.
The whole family can learn together.
In our homeschool, I am always looking for ways for my kids to work together on projects and lessons. A history timeline is a great way to encourage cooperation with kids.
The whole family can work together on one timeline, and each child can add their own events and people to the timeline as they study them.
Types of Timelines
There are many ways to make a history timeline in your homeschool, even if you don’t have space on a wall to display a large timeline. Here are some options to consider.
Make a wall timeline
When most people think of a history timeline, they think of a large poster sized timeline that hangs on the wall. You can write or draw historical events or people on cardstock or index cards and add them to the timeline as you study them.
Pros:
- Easy to see the big picture and make connections between historical events
- Easy for multiple children to add events to the timeline
- Easy to reference as needed
Cons:
- Takes up a lot of wall space in the house
- Need a large empty wall to display the timeline
Make a history notebook or journal
A great alternative to a large wall timeline is to include your timeline in a history timeline notebook or journal. You can make the entire notebook into one giant timeline, or add individual timeline pages throughout the notebook as you study different historical eras.
Pros:
- Takes up less space in the house than a wall timeline
- Each child can create their own timeline
- Easy to add details likes maps or facts right on the timeline
- Kids can turn their hard work into a keepsake to treasure
Cons:
- Harder to see historical connections at a glance
- Can be harder to add events to the timeline (try using a 3-ring binder instead of a spiral notebook so it’s easier to add pages as needed)
Make a lapbook or booklet
Another alternative that works well for studying a shorter time period in history is to create a lapbook. Lapbooks allow you to combine a timeline with facts, maps, and graphic organizers in a fun and hands-on way.
Pros:
- Easy to see the context for a specific historic person or event
- Includes maps, facts, and other important details
- Great for specific periods in history
Cons:
- Hard to use for a longer period of history
- Harder to see the main idea and make connections between various events
- Difficult to add information once the lapbook is completed

Using Timeline Figures
What if you want to make a beautiful keepsake timeline with your kids, but you are not an artist? The great news is that as a homeschool mom, you do not have to DIY a timeline and make your own timeline figures yourself!
We have been using the Individual Timeline Set: Creation to Christ (Beginning – 100 AD) from Home School in the Woods, and they make creating a timeline easy!
Home School in the Woods offers timeline sets for both U.S. History and World History, from ancient history to modern day. Here are 10 things we love about the Home School in the Woods Timeline Sets.
1. This is a digital resource.
All of the Home School in the Woods timeline sets are completely digital PDF files. This is ideal for a family like mine with multiple kids who will be using the timeline set over the years. It means that we can pay for the resource once, but print a new set of figures for each child to use.
2. We can create a customized timeline.
This timeline set is easy to use to create a customized timeline. The set includes 26 pages of timeline figures featuring major people and events in history. Kids can cut them out and glue them into whatever kind of timeline they choose.
I love that we had the freedom to choose which figures and events to include in our homeschool history timeline.
We used this resource along with our history studies from Book 1 of the Story of the World curriculum. It was easy to find the characters and events that we were learning about in our curriculum and add them to our timeline. We were easily able to skip the historical figures that aren’t included in the curriculum that we chose.
Because this resource is so flexible, it would be easy to use it with just about any world history curriculum.
3. It comes with different sizes of timeline figures.
The individual timeline set came with 2 different sizes of timeline figures. The larger size is designed to be used on a wall timeline. The smaller figures can be used inside a notebook or lapbook.
We had already started a history lapbook this year, and we found that the smaller notebook size figures were perfect to add to our lapbook. We were also inspired by this resource to start creating homeschool history notebook timelines. We were able to add the figures to our notebooks as we studied them.
4. The index made it easy to find specific events.
This timeline set also comes with a comprehensive introductory document and index of the people, historical facts, and key events that are included.
The index was helpful because we could search the index to find the figures that would correspond with each history lesson we completed. Because the page numbers are the same in all the different versions of the timeline figures, we were able to find and print the figures we needed quickly and easily.
5. It is comprehensive.
I was impressed that this timeline set includes over 250 different people, events, and important dates from history. There were a tremendous variety of events included, and we found that the set had almost everything that was covered in our history curriculum (plus a lot more).
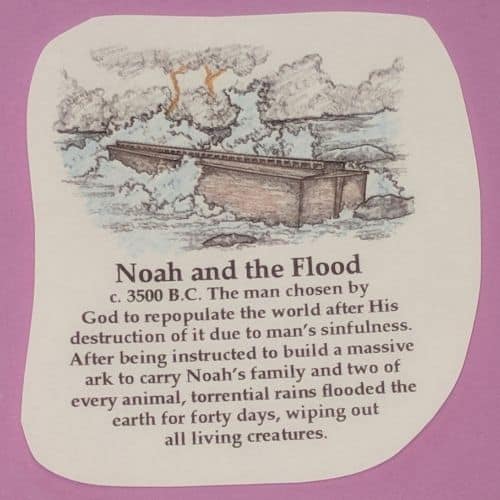
6. It includes both Biblical and world history.
When I teach history to my kids, one of my goals is to show them how events in world history relate to the Bible. My family believes that the Bible is an important history book, and we teach the Bible right along with early world history.
This timeline set makes it easy to teach this worldview. The figures included depict important people and events from the Bible right along with other events in world history. I love that everything was included in one resource!
I also appreciated the flexibility to be able to choose which figures to include as we create our own customized timeline project.
7. The figures have optional facts as well.
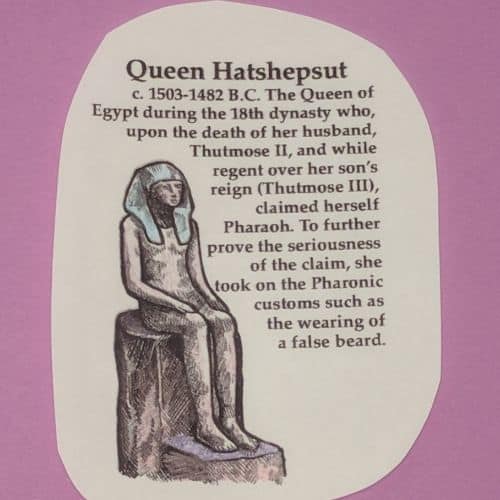
This timeline figure set includes both images with names only, and images with a brief summary of why that event was important in history. We chose to use the images with the facts, so that my kids could remember what made each person important.
Families with older kids could use the images with the names alone, and allow kids to write their own summaries in their timelines.
One of my favorite things about this resource is that it is incredibly versatile, and can be customized to fit the needs of your family.
8. The illustrations are beautiful.
The artwork in this timeline figure set is incredible. The illustrations are incredibly detailed, and they are realistic enough that kids of all ages will enjoy them. The high quality illustrations really set this timeline set apart from other timeline resources.
9. Kids can color the pictures.
The illustrations are black and white, with space for kids to color in the pictures. This is a great way for kids to take ownership of their timeline and make it unique. It is also a fun way to add some art into your child’s history lessons.
10. Kids can do this themselves.
Once the timeline is set up, kids will be able to use this resource themselves. Even a younger student who can cut, color, and glue can create a beautiful keepsake history timeline using the Individual Timeline Sets!

Learn More About Home School In the Woods Timeline Sets
You can learn more about the Individual Timeline Set: Creation to Christ (Beginning – 100 AD) from Home School in the Woods and download a sample page to try for yourself.
You can read more reviews of Home School in the Woods on the Homeschool Review Crew Blog!